源代码
需要安装pyqt5这个库
python"># -*- coding: utf-8 -*-
from PyQt5.QtWidgets import QApplication, QMainWindow, QLabel, QVBoxLayout, QPushButton, QFileDialog, QAction, QSlider, QHBoxLayout, QWidget
from PyQt5.QtGui import QPixmap
from PyQt5.QtCore import Qt, QSize
import sys
import os
class ImageViewer(QMainWindow):
def __init__(self):
super().__init__()
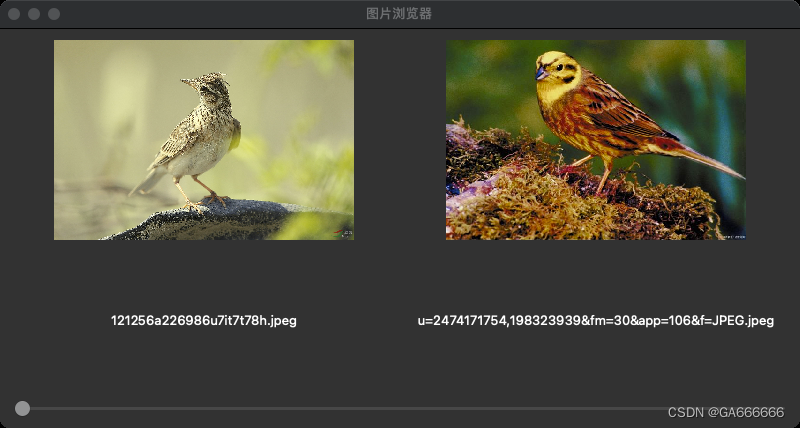
self.setWindowTitle("图片浏览器")
self.setGeometry(100, 100, 800, 400)
self.image_label_1 = QLabel(self)
self.image_label_1.setAlignment(Qt.AlignCenter)
self.image_name_label_1 = QLabel(self)
self.image_name_label_1.setAlignment(Qt.AlignCenter)
self.image_label_2 = QLabel(self)
self.image_label_2.setAlignment(Qt.AlignCenter)
self.image_name_label_2 = QLabel(self)
self.image_name_label_2.setAlignment(Qt.AlignCenter)
self.slider = QSlider(Qt.Horizontal, self)
self.slider.valueChanged.connect(self.slider_value_changed)
self.current_index = 0
self.image_paths = []
layout = QHBoxLayout()
layout_1 = QVBoxLayout()
layout_1.addWidget(self.image_label_1)
layout_1.addWidget(self.image_name_label_1)
layout_2 = QVBoxLayout()
layout_2.addWidget(self.image_label_2)
layout_2.addWidget(self.image_name_label_2)
layout.addLayout(layout_1)
layout.addLayout(layout_2)
vbox = QVBoxLayout()
vbox.addLayout(layout)
vbox.addWidget(self.slider)
central_widget = QWidget(self)
central_widget.setLayout(vbox)
self.setCentralWidget(central_widget)
self.create_menu()
self.load_images()
def create_menu(self):
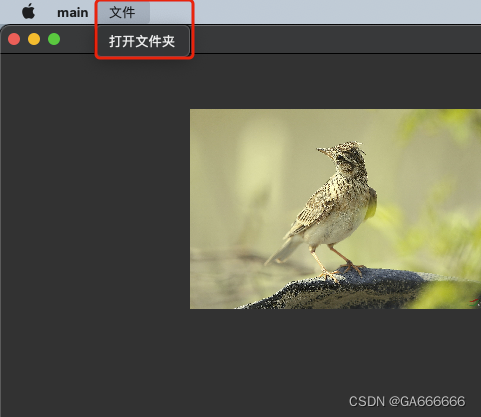
open_folder_action = QAction("打开文件夹", self)
open_folder_action.triggered.connect(self.open_folder)
menubar = self.menuBar()
file_menu = menubar.addMenu("文件")
file_menu.addAction(open_folder_action)
def open_folder(self):
folder_dialog = QFileDialog.getExistingDirectory(self, "选择文件夹")
if folder_dialog:
self.image_paths = self.get_image_files(folder_dialog)
if self.image_paths:
self.current_index = 0
self.load_images()
def get_image_files(self, folder_path):
image_files = []
for file_name in os.listdir(folder_path):
if file_name.lower().endswith(('.png', '.jpg', '.jpeg', '.bmp')):
image_files.append(os.path.join(folder_path, file_name))
return image_files
def load_images(self):
if self.image_paths:
if self.current_index < len(self.image_paths):
image_path_1 = self.image_paths[self.current_index]
pixmap_1 = QPixmap(image_path_1)
self.image_label_1.setPixmap(
pixmap_1.scaled(QSize(300, 300), aspectRatioMode=Qt.AspectRatioMode.KeepAspectRatio))
self.image_name_label_1.setText(os.path.basename(image_path_1))
else:
self.image_label_1.clear()
self.image_name_label_1.clear()
if self.current_index + 1 < len(self.image_paths):
image_path_2 = self.image_paths[self.current_index + 1]
pixmap_2 = QPixmap(image_path_2)
self.image_label_2.setPixmap(
pixmap_2.scaled(QSize(300, 300), aspectRatioMode=Qt.AspectRatioMode.KeepAspectRatio))
self.image_name_label_2.setText(os.path.basename(image_path_2))
else:
self.image_label_2.clear()
self.image_name_label_2.clear()
self.slider.setMinimum(0)
self.slider.setMaximum(len(self.image_paths) - 1)
self.slider.setValue(self.current_index)
def slider_value_changed(self, value):
self.current_index = value
self.load_images()
if __name__ == '__main__':
app = QApplication(sys.argv)
viewer = ImageViewer()
viewer.show()
sys.exit(app.exec_())